Set up
Before starting, make sure you follow the Get started guide, where you'll find what's needed for integration.
Prerequisites
| Release | Release date | React Native | React | Expo |
|---|---|---|---|---|
| 3.0 | August, 2025 | ~0.79 | ~19 | ~53 |
| 2.5 | February, 2025 | ~0.76.3 | ~18.3.1 | ~53 |
Installation
The first step is to install the Weavr Push Provisioning SDK as a dependency of your app:
- npm
- yarn
npm install @weavr-io/push-provisioning-react-native
yarn add @weavr-io/push-provisioning-react-native
You'll need to configure the iOS and Android native projects within your app, as Push Provisioning requires native capabilities.
Set up the iOS project
Configure CocoaPods
Add a the following sources within your Podfile:
source 'https://gitlab.com/phyreapp/ios-specs.git'

# rest of your Podfile
# …
You'll need to add the MeaWallet SDK framework, one of the dependencies, to your project. Depending on how you've set up your iOS app, this may be accomplished in different ways. However, the following resources should provide a starting point of how to do this:
Our support team can provide this framework, get in touch with us if you or your team hasn't obtained it yet.
Finally, run pod install in the iOS project directory:
cd ios
pod install
Set up your app for Push Provisioning
A requirement of iOS Push Provisioning with Apple, is for your mobile app to complete the Entitlement process.
The first step is to add the requirement capabilities and Entitlements to your app.
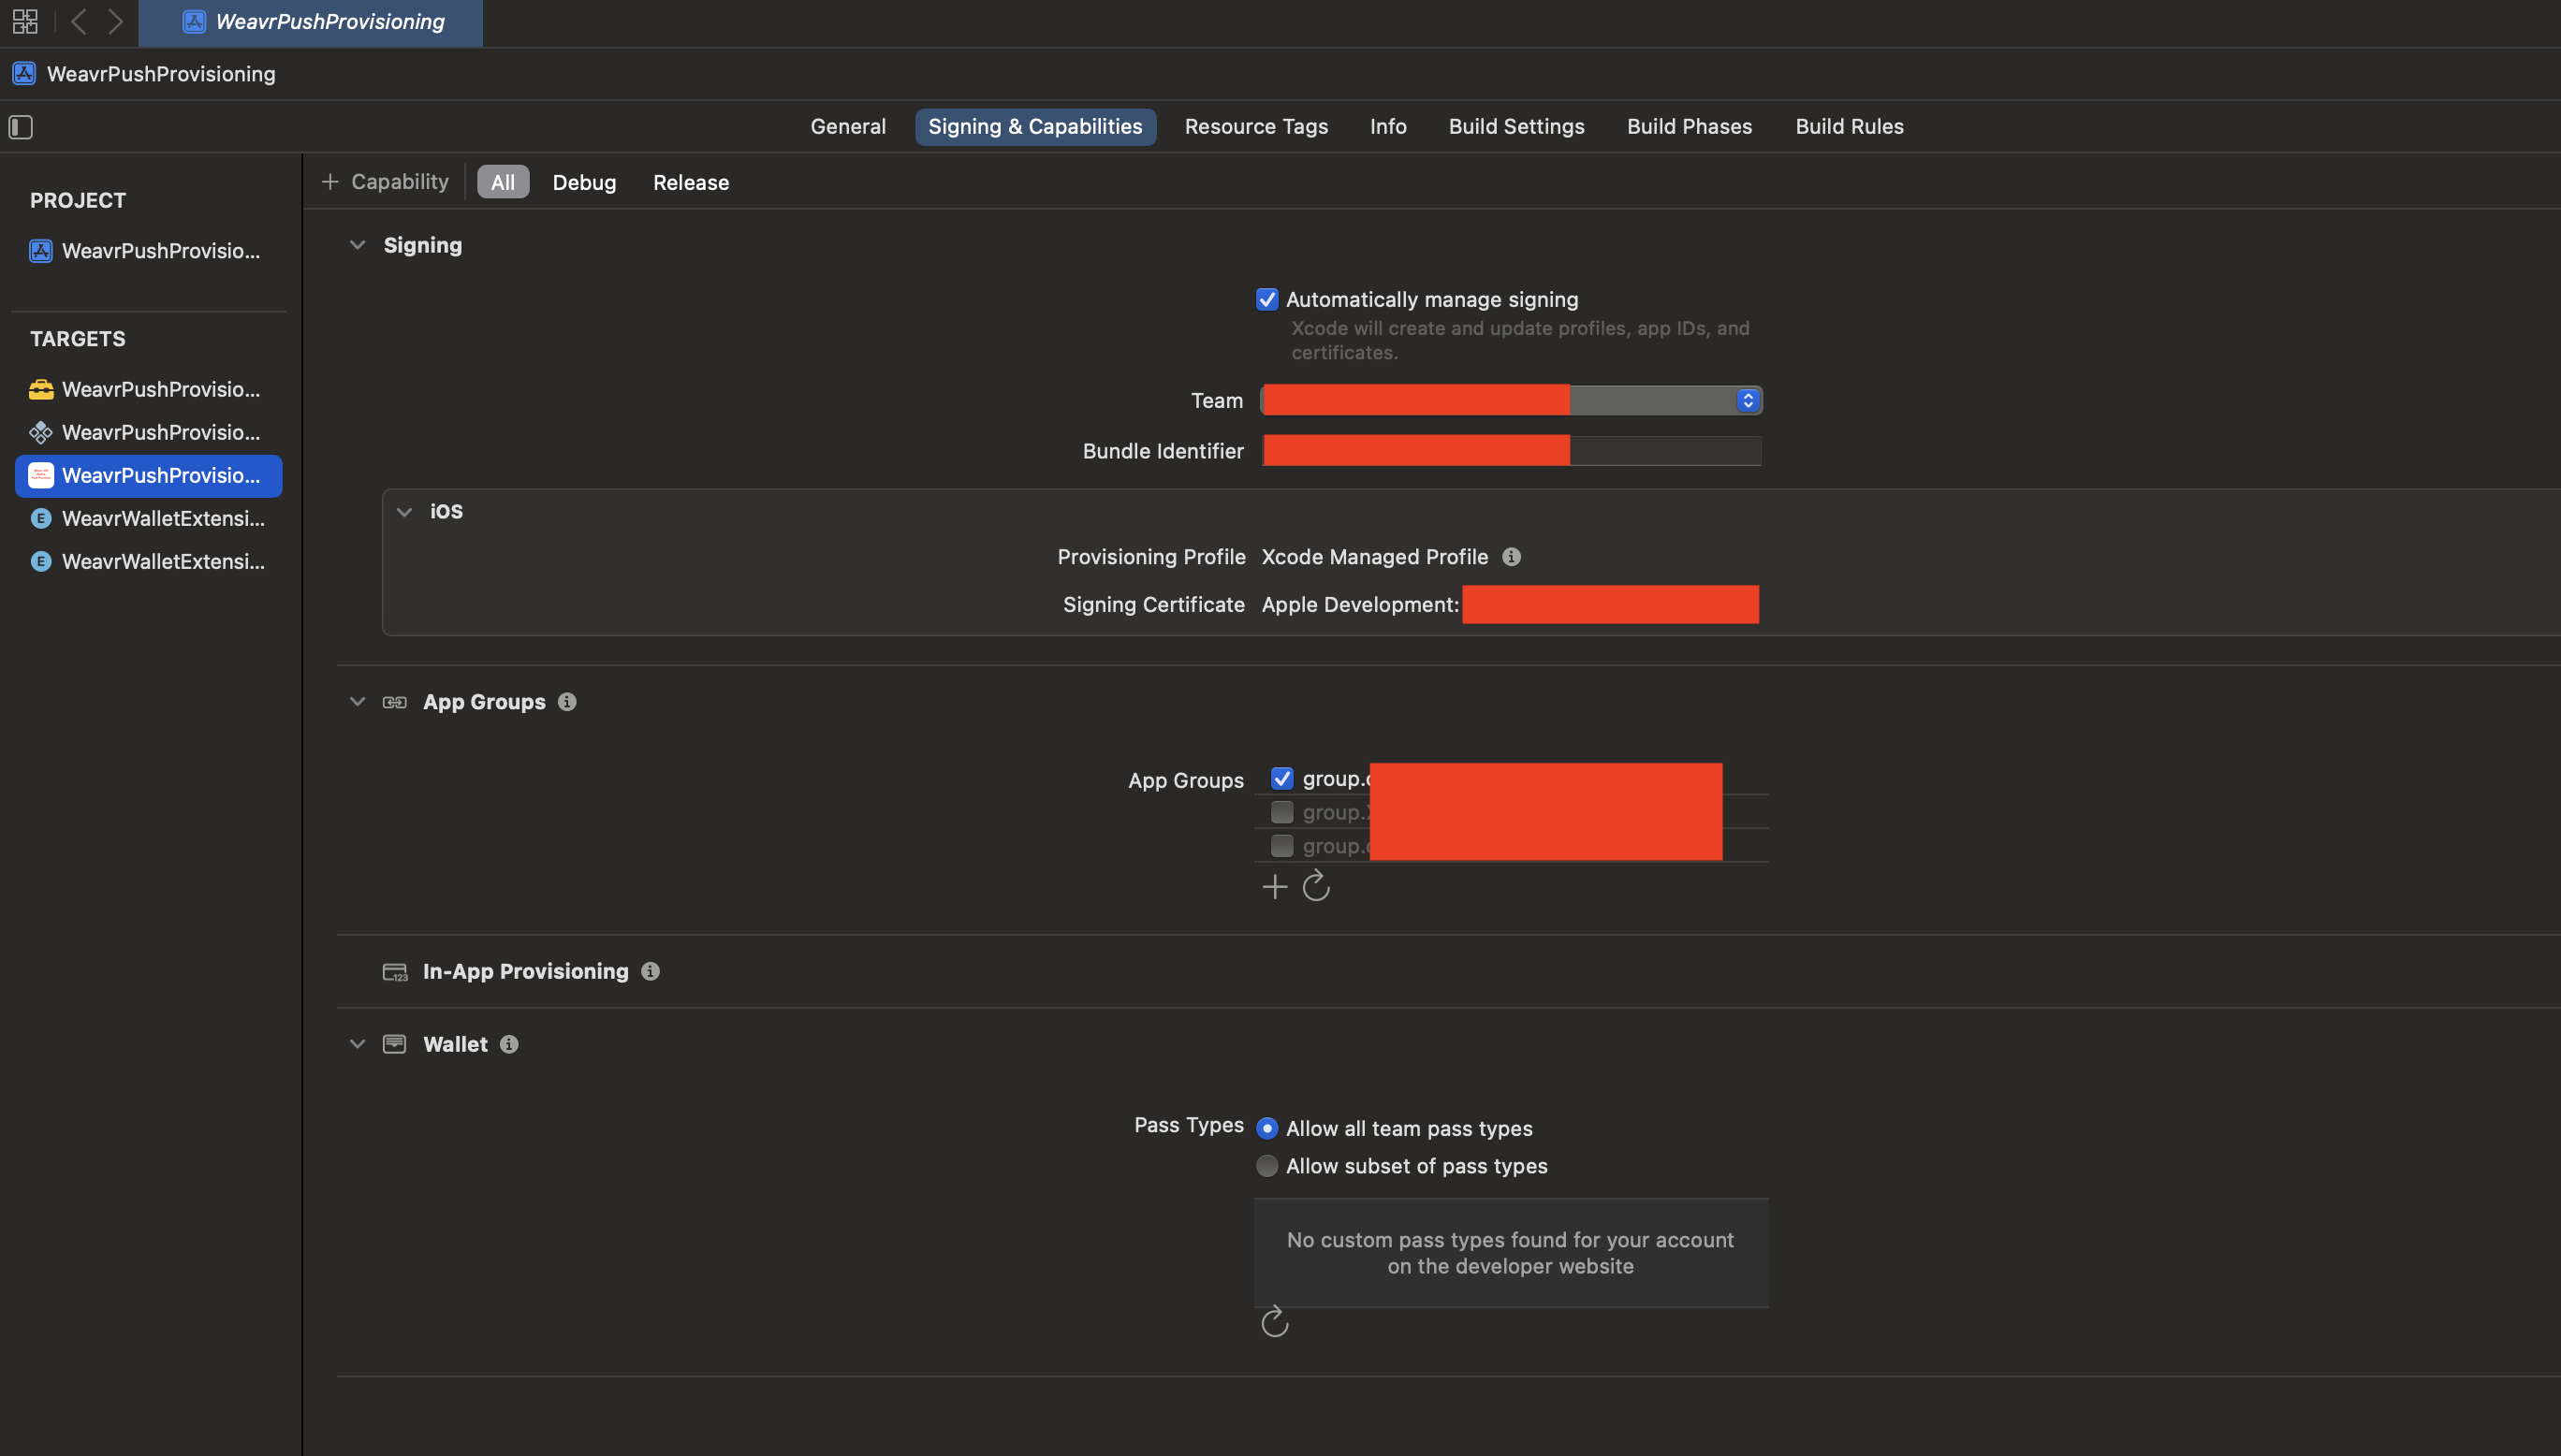
Navigate to the project containing your app in Xcode, and select your App's target, then navigate to the tab Signing & Capabilities.
Here, ensure you have the following capabilities enabled:
- App Groups: To allow the Wallet Extensions to access the storage of your app.
- In-App Provisioning: To allow to provision cards from within your app.
- Wallet, including Allow all team pass types: To check the status of the cards within Apple Pay, and
decide whether to display the
AddToWalletButton.
To be able to provision a card successfully, Apple requires you to:
- Distribute the app via TestFlight
- Ensure that the application ID and provisioning profiles you use to distribute your builds, have access to all capabilities described earlier.
Once your project is configured correctly, your target should look like this:
Set up the Android project
Bare React Native and non managed Expo projects
The first step is to ensure the Android project used to compile your app has access to all the dependencies needed.
Ensure you don't commit to your repository, the username and password granting access to MeaWallet's repository.
Edit the build.gradle file in your Android project to add the maven repositories needed.
On bare React Native and Expo non-managed projects, where you have committed your Android repository and have access to its content, you'll need to edit the project's build.gradle file and add the following snippet:
The snippet below assumes that you have a secrets.properties file at the root of your app's Android project that includes the following keys:
PHYRE_MAVEN_REPO_TOKEN: The token to the Phyre SDK maven repositoryMEAWALLET_SDK_USERNAME: The username to the MeaWallet SDK maven repositoryMEAWALLET_SDK_PASSWORD: The password to the MeaWallet SDK maven repository
This file should ideally be ignored from your repository, and instead be securely stored and distributed.
def keystorePropertiesFile = new File(projectDir, "secrets.properties")
def keystoreProperties = new Properties()
keystoreProperties.load(new FileInputStream(keystorePropertiesFile))

allprojects {
  repositories {
    google()
    mavenCentral()
    maven {
      url = uri("https://gitlab.phyreapp.com/api/v4/projects/335/packages/maven")
      name = "GitLab"
      credentials(HttpHeaderCredentials) {
        name = "Private-Token"
        value = keystoreProperties['PHYRE_MAVEN_REPO_TOKEN']
      }
      authentication {
        create("header", HttpHeaderAuthentication)
      }
    }

    maven {
      url 'https://nexus.ext.meawallet.com/repository/mpp-android-group/'

      credentials {
        username keystoreProperties['MEAWALLET_SDK_USERNAME']
        password keystoreProperties['MEAWALLET_SDK_PASSWORD']
      }
    }
  }
}
Once the project file has been updated, edit your app's build.gradle file to add the following changes in the dependencies { block:
  implementation files("$rootDir/../node_modules/@weavr-io/push-provisioning-react-native/android/libs/PushProvisioning-Release.aar")
  debugImplementation 'com.meawallet:mpp-prod:1.11.3-debug'
  releaseImplementation 'com.meawallet:mpp-prod:1.11.3'
  coreLibraryDesugaring("com.android.tools:desugar_jdk_libs:2.1.5")
This snippet adds, as a dependency, the native Push Provisioning SDK, which is bundled within the ReactNative SDK, thus ensuring the right version is used, as well as adding any other dependencies needed for correct functioning.
Expo managed projects
If your project is managed by Expo, configure the Expo build properties to define the new repository, and include the dependencies listed earlier.
Resolving the maven repos can be achieved with the extraMavenRepos property of PluginConfigTypeAndroid.
Adding the correct dependencies can be achieved using Expo's Wrap third-party native libraries guide.
Note that the required aar file is in node_modules/@weavr-io/push-provisioning-react-native/android/libs/PushProvisioning-Release.aar and your module should point to it rather than use a copy, this ensures that future updates of the Push Provisioning SDK won't get out of sync with Android code.