Biometrics - concepts and setup (React Native SDK)
Biometric authentication lets your users prove who they are with their device's fingerprint or face. In a Weavr integration it does two distinct jobs:
- Returning-user login. After the first sign-in with the Password component, a returning user logs in with biometrics instead of re-entering their password each session.
- Strong authentication for SCASCA (Strong Customer Authentication). Strong Customer Authentication - a two-factor authentication solution required by PSD2 regulations for when end-users are accessing their payment account sensitive information or initiating transactions. SCA requires at least two of the following: something you know (password), something you have (device), or something you are (biometrics). challenges. An enrolled device plus the user's biometrics together satisfy the possession and inherence factors Weavr requires whenever it raises a Strong Customer Authentication (SCASCA (Strong Customer Authentication). Strong Customer Authentication - a two-factor authentication solution required by PSD2 regulations for when end-users are accessing their payment account sensitive information or initiating transactions. SCA requires at least two of the following: something you know (password), something you have (device), or something you are (biometrics).) challenge - sending money, viewing card details, approving a 3DS3DS (3-D Secure). 3-D Secure - an additional security layer for online credit and debit card transactions. It adds an authentication step where the cardholder verifies their identity with the card issuer during the purchase, reducing fraud and providing liability protection for merchants. purchase, and so on. For the concept, see SCA challenges.
A single device enrollment powers both jobs. The integration breaks down into three stages, which map to the pages in this section:
- Concepts and setup (this page) - configure your program, initialize the SDK, and set up push notifications, the channel SCASCA (Strong Customer Authentication). Strong Customer Authentication - a two-factor authentication solution required by PSD2 regulations for when end-users are accessing their payment account sensitive information or initiating transactions. SCA requires at least two of the following: something you know (password), something you have (device), or something you are (biometrics). challenges arrive on.
- Enrollment and login - enroll a device once, then log returning users in with biometrics.
- SCASCA (Strong Customer Authentication). Strong Customer Authentication - a two-factor authentication solution required by PSD2 regulations for when end-users are accessing their payment account sensitive information or initiating transactions. SCA requires at least two of the following: something you know (password), something you have (device), or something you are (biometrics). challenges - receive and approve the challenges Weavr raises for sensitive actions.
Prerequisites
Before implementing authentication via biometrics, you must:
- Configure your program in the Embedder PortalEmbedder PortalA web-based portal where embedders manage their Weavr account: browse customers and instruments, configure programmes, find API credentials and profile IDs, run Sandbox simulations, and inspect webhook deliveries. Sandbox and Live are separate, with their own credentials and data. - see Portal configuration.
- Integrate the Password Component into your app - see Required components.
The Password Component is required because:
- Users must authenticate with their password before enrolling for biometrics. The password must be tokenizedTokenizeReplace a card's primary account number (PAN) with a unique digital token that stands in for the real card during a transaction. When a cardholder adds a card to Apple Pay or Google Pay via push provisioning, the wallet provider stores a device-specific token rather than the underlying PAN, so the real card number isn't exposed on the device or shared with merchants. for secure communication.
- The user must have a password or passcode set, because if biometric authentication fails (e.g. fingerprint not recognized), either password or passcode can be used as a fallback identification method.
Required components
Password component
- Required for initial authentication
- Used as the fallback authentication method (supports both password and passcode)
- Must be tokenizedTokenizeReplace a card's primary account number (PAN) with a unique digital token that stands in for the real card during a transaction. When a cardholder adds a card to Apple Pay or Google Pay via push provisioning, the wallet provider stores a device-specific token rather than the underlying PAN, so the real card number isn't exposed on the device or shared with merchants. for security
Follow the Password component guide to implement this in your app.
Portal configuration
Before integrating biometrics in your app, configure your program in the Embedder Portal. These steps apply to iOS, Android, and React Native integrations.
1. Configure the fallback factor
Biometric Authentication uses a knowledge factor (something you know) as the fallback when biometric authentication can't complete - for example, a fingerprint isn't recognized. From an SCASCA (Strong Customer Authentication). Strong Customer Authentication - a two-factor authentication solution required by PSD2 regulations for when end-users are accessing their payment account sensitive information or initiating transactions. SCA requires at least two of the following: something you know (password), something you have (device), or something you are (biometrics). perspective, this satisfies the "knowledge" factor.
We recommend password as the fallback factor for new integrations. Passcode is also supported, but only if your app does not implement push provisioning.
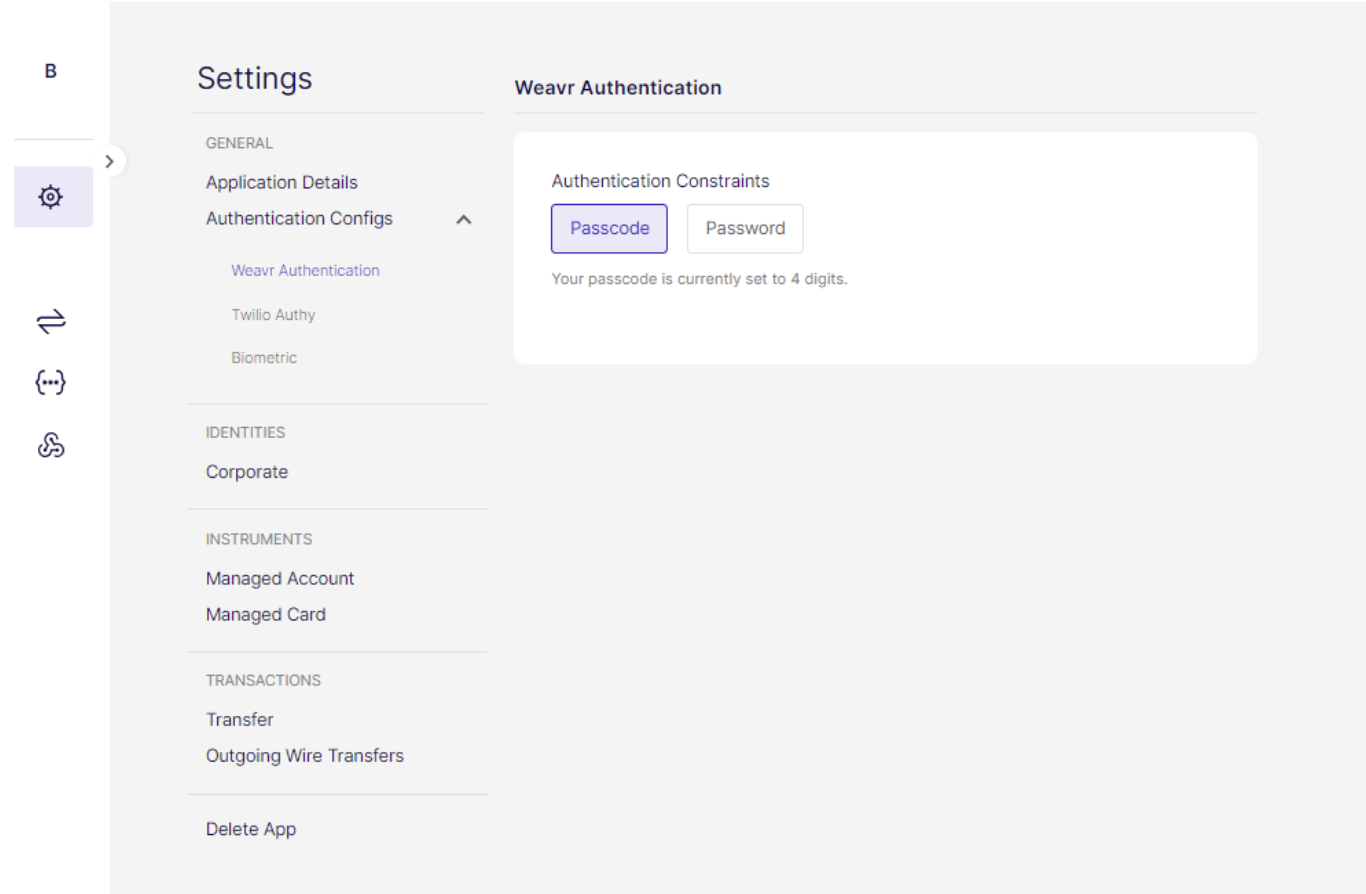
In the Settings tab, select Authentication configs > Weavr authentication > Authentication constraints and choose Password (recommended) or Passcode.
If you use passcode, we can configure the passcode length for you to between 4 and 8 digits. The initial value is 4.
2. Turn on biometric authentication
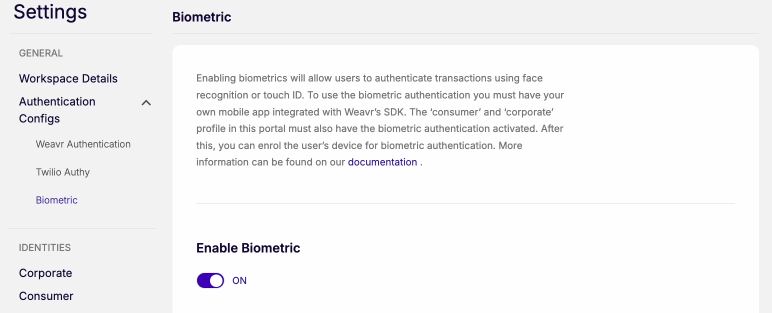
In the same Authentication configs tab, select Biometric > Enable Biometric.
3. Provide your Firebase service account key
Biometric Authentication uses two services powered by Firebase:
- Push notification service, for reliable, and secure communication.
- Play Integrity API (Android only), a Google requirement that provides app security and defense against abuse.
To enable the push service, provide your Firebase Service Account Key.
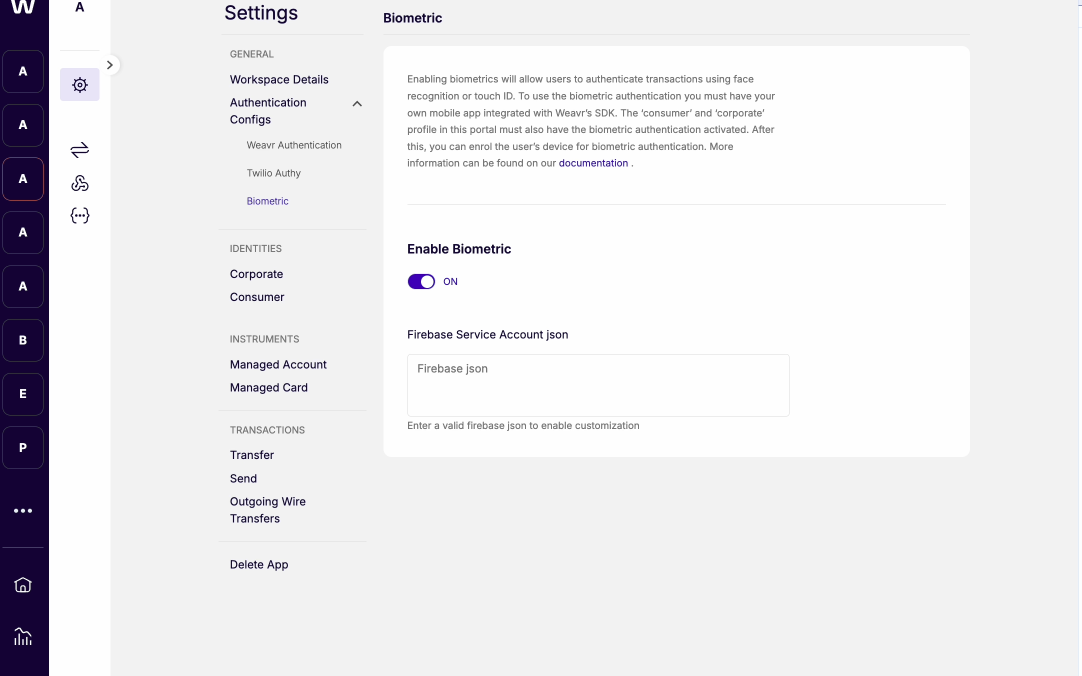
Configure the Firebase JSON key
- Create a service account.
- Define service account details.
- Grant the service account access to the project.
- Grant user access to the service account (optional).
- Access the service account by filtering on the Service Account Name you defined.
- Select Manage keys.
- Choose Add Key > JSON.
- The downloaded file is the Firebase JSON file needed to complete the configuration.
- Service accounts and applicable keys are available through the Firebase Admin SDK screen.
Turn on the Play Integrity API in Google Cloud (Android only)
- Open the Google Cloud Console.
- Select your project.
- Use the project selector at the top to choose your GCP project for the Play Integrity API.
- If you don't have a project, create one with New Project.
- Open APIs & Services > Enabled APIs & services.
- Turn on the Play Integrity API.
- Select + ENABLE APIS AND SERVICES.
- Search for "Play Integrity API" and select it.
- Select ENABLE.
- Billing: ensure billing is turned on for your project, as the Play Integrity API may incur usage costs.
- Quotas: familiarize yourself with API usage quotas and limits in the Google Cloud Console.
- API key: you may need an API key for back-end access to the Play Integrity API. Create and manage API keys in the Google Cloud Console.
Refer to the official Play Integrity API documentation for up-to-date information and best practices.
Link your app in Google Play Console (Android only)
After enabling the Play Integrity API in GCP, you must also link your app in Google Play Console. Without this step, biometric enrollment fails on production builds with an ENROLLMENT_FAILED: Invalid Origin error.
- Open Google Play Console and select your app.
- In the left menu, go to Release → App integrity.
- Under Play Integrity API, click Link Cloud project.
- Select the same GCP project where you enabled the Play Integrity API.
- Click Link.
Both steps are required-enabling via GCP Console alone is not sufficient. The Google Play Console link is what allows your app's builds to pass integrity checks at runtime.
Attestation: iOS vs Android
The SDK uses different attestation mechanisms on each platform:
| Platform | Mechanism | Setup required |
|---|---|---|
| iOS | Firebase App Check | Register app in Firebase Console, configure App Check |
| Android | Play Integrity API (direct) | Enable in GCP Console + link in Google Play Console |
These are independent systems. Configuring Firebase App Check for iOS does not cover Android. The Android SDK calls the Play Integrity API directly - it does not use Firebase App Check.
For cross-platform teams: if iOS biometrics work but Android fails with ENROLLMENT_FAILED: Invalid Origin, the most likely cause is that the Play Integrity setup for Android has not been completed.
4. Customize the UI
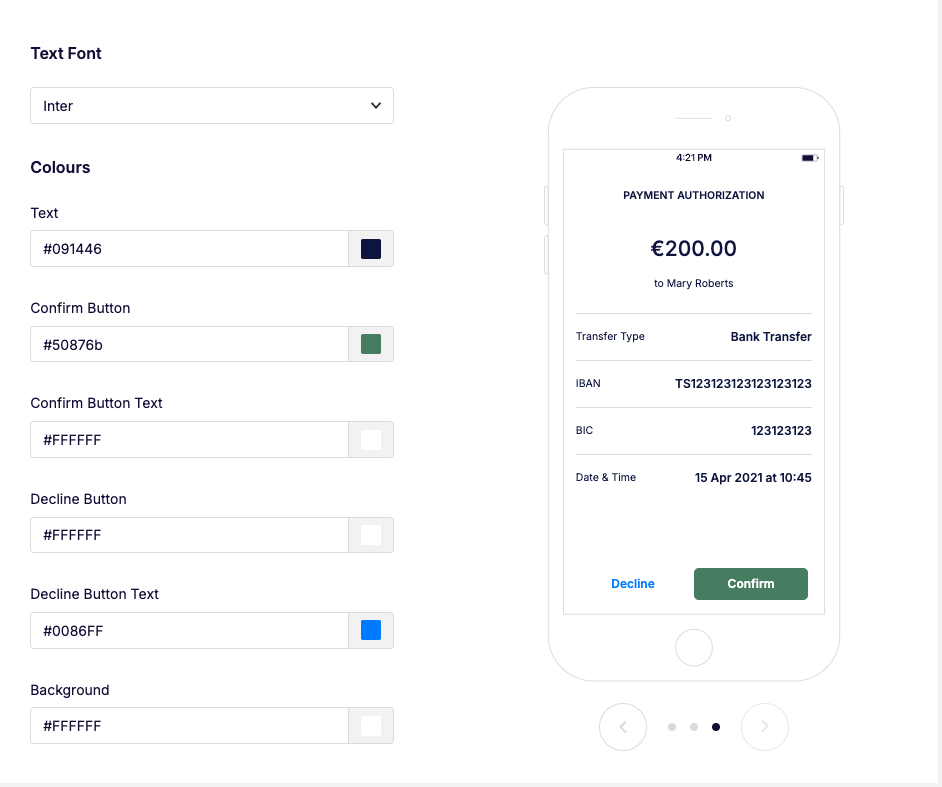
Choose a brand theme for payments and 3DS3DS (3-D Secure). 3-D Secure - an additional security layer for online credit and debit card transactions. It adds an authentication step where the cardholder verifies their identity with the card issuer during the purchase, reducing fraud and providing liability protection for merchants. transaction screens by selecting the font and colors that match your app's branding.
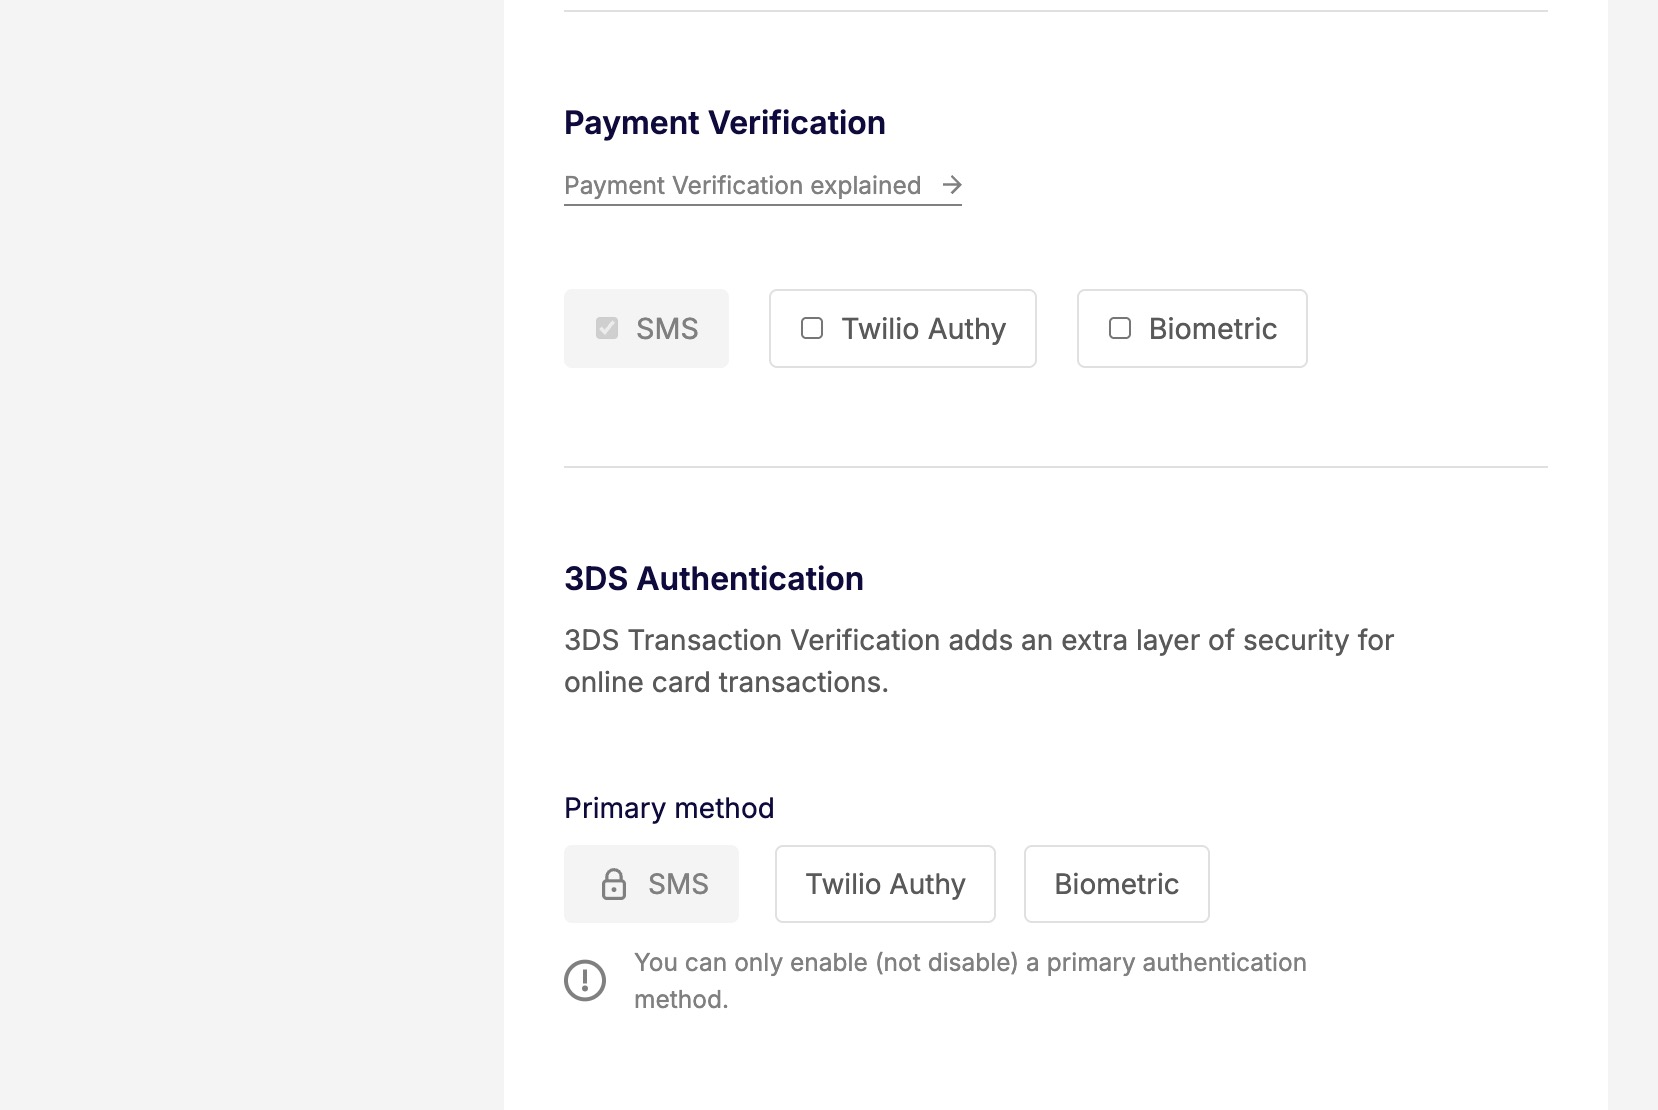
5. Turn on biometrics for user actions
Biometric Authentication can be used for several user actions:
- Step-up: a single biometric verification on an enrolled device serves as two independent factors-something you are (biometry) and something you have (enrolled device).
- Payment verification: transaction confirmation under PSD2 involves verifying the identity of the customer for a specific transaction.
- 3DS3DS (3-D Secure). 3-D Secure - an additional security layer for online credit and debit card transactions. It adds an authentication step where the cardholder verifies their identity with the card issuer during the purchase, reducing fraud and providing liability protection for merchants.: multiMultiWeavr Multi is an embedded finance solution that allows you to integrate financial services into your own application, providing a seamless experience for your customers. It enables you to offer managed accounts, managed cards, and transactions without requiring financial expertise.-factor authentication for online credit and debit card transactions.
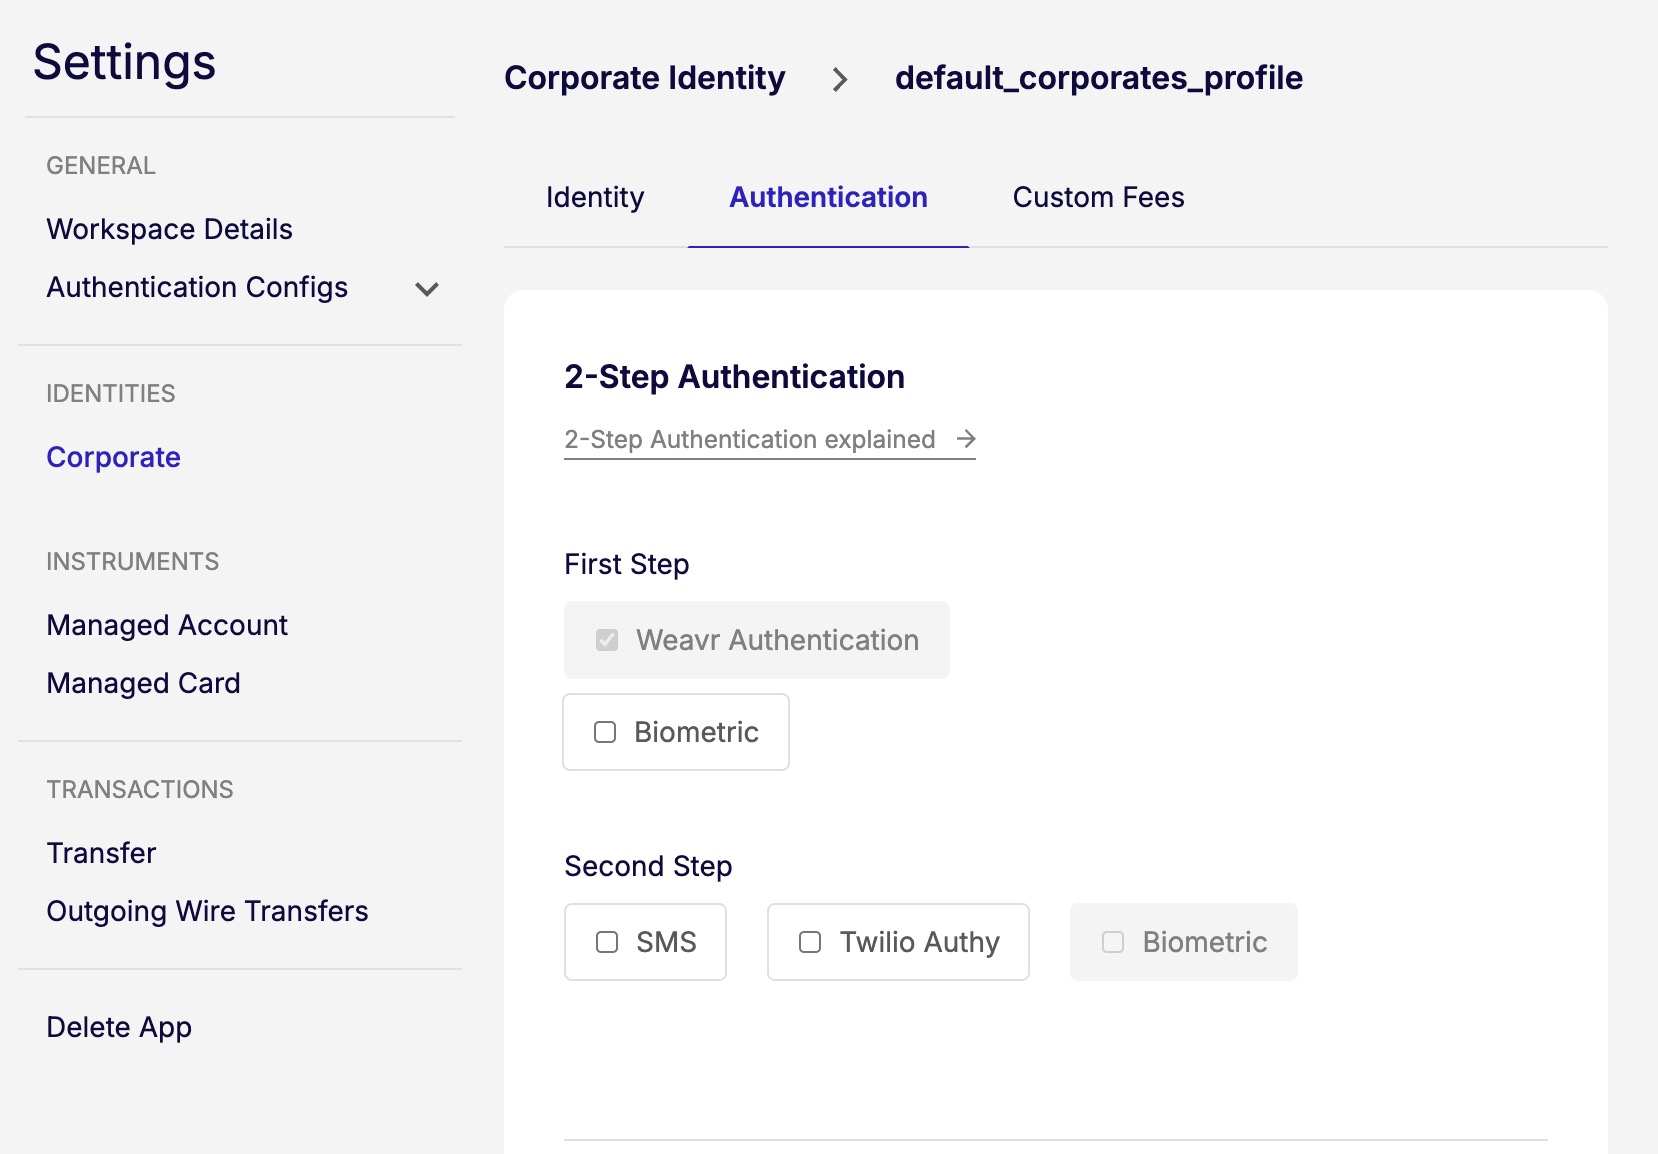
In the Settings tab, select Customers > CorporatesCorporates (Corporate Identity). Business entities that can be onboarded as customers on Weavr. Corporate customers represent companies and require Know Your Business (KYB) verification. They can have multiple authorised users and issue cards to card assignees. > Authentication and set Biometric as the authentication method for the user actions you want it to apply to.
Set up the SDK
Make sure you have read the overall React Native Get started section for guidance on setting up, installing, and initializing the SDK.
To use the React Native SDK, ensure you have obtained the necessary credentials from the Embedder PortalEmbedder PortalA web-based portal where embedders manage their Weavr account: browse customers and instruments, configure programmes, find API credentials and profile IDs, run Sandbox simulations, and inspect webhook deliveries. Sandbox and Live are separate, with their own credentials and data.. Add the values in a configuration file or wherever is convenient to store securely in your app.
UI_KEY = "Your UI key goes here";
API_KEY = "Your API key goes here";
OWT_PROFILE_ID = "Your profile id goes here";
SEND_PROFILE_ID = "Your send profile ";
Initialize the SDK
Initialize both the main SDK and the Biometric Authentication (PSAPSA (Push Step-up Authentication). Push Step-up Authentication - the mechanism in our mobile SDKs that delivers a step-up challenge to an enrolled device as a push notification and verifies it with the user's device biometrics. PSA covers device enrollment, biometric login, and biometric verification of SCA challenges for sensitive operations such as outgoing wire transfers or accessing card details. Exposed as `UXComponents.psa` on iOS and Android and via `initializePSA` on React Native.) component on app startup, before you enroll a device, log a user in, or handle a challenge:
import {
  initializeUXComponents,
  initializePSA,
} from "@weavr-io/secure-components-react-native";

initializeUXComponents(env, WEAVR_UI_KEY)
  .then((res) => console.log(res))
  .catch((e) => console.log(e));

//if you are using biometric solution
initializePSA(env)
  .then((res) => console.log(res))
  .catch((e) => console.log(e));
Push notifications
Push notifications exist primarily to deliver SCA challenges to the device, and are also used during enrollment and biometric login. Set them up once so challenges can reach your app.
- Android
- iOS
-
Notification channel
- The SDK automatically creates a notification channel with ID "Weavr-auth-channel"
- The channel is configured with high importance for authentication notifications
- Vibration and lights are enabled by default
-
Permissions
import { PermissionsAndroid } from "react-native";async function requestUserPermission() {// Request notification permission for Android 13+if (Platform.OS === "android") {await PermissionsAndroid.request(PermissionsAndroid.PERMISSIONS.POST_NOTIFICATIONS);}}
-
Background modes
- Add the following to your
app.config.ts:
ios: {infoPlist: {UIBackgroundModes: ['fetch', 'remote-notification'],},entitlements: {'aps-environment': 'production',},} - Add the following to your
Provide the FCM token
The Firebase Cloud Messaging (FCM) token must be set before you enroll the user's device, and every time it changes. Push notifications are used for biometric login and Strong Customer Authentication (SCASCA (Strong Customer Authentication). Strong Customer Authentication - a two-factor authentication solution required by PSD2 regulations for when end-users are accessing their payment account sensitive information or initiating transactions. SCA requires at least two of the following: something you know (password), something you have (device), or something you are (biometrics).) flows, so this token is required for both.
This operation is only required for iOS. On Android, calling updateFCMToken before the SDK has obtained a token returns an "operation not supported" error - skip it on Android and let the SDK manage FCM token registration automatically.
import { updateFCMToken } from "@weavr-io/secure-components-react-native";

const token = await messaging().getToken();

updateFCMToken(token)
  .then((res) => console.log("token updated"))
  .catch((e) => console.log(e));
Next steps
With your program configured and the SDK set up, you can: